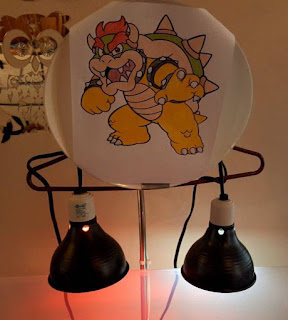
Here’s our Russian Tortoise! His name is Bowser. Bowser needed a habitat upgrade and my budget was $20.
Since his name is Bowser, I was inspired by the Bowser’s Castle level in Mario Kart.
I got a big storage tub from Dollar General for $12.50 and so far, that’s been my only purchase for it.
Other supplies:
recycled yarn
rock from my yard
hot glue gun
leftover substrate from his last habitat (get organic mulch from home depot, lowe’s, etc- not a pet store. whenever possible, avoid products targeted for pets because they’re way overpriced)
chopsticks from takeout chinese place
assorted cardboard inner tubes from tin foil, paper towel, etc
The backing of a shelving unit (We use the shelving unit as a room divider so it made sense to be able to access it from both sides)
I used the same light system that I used for his last habitat. I hung 2 lights (1 heat, 1 UV) from a plastic hanger, and hung that from a broken floor lamp.
First thing I did was make the carpet. I had leftover red and burgundy chunky yarn. I don’t remember what brand it was - it’s been ripped out and reworked a few times. And a K hook.
I chose this particular stitch because I wanted him to be able to grip and move around more easily. It also functions as a ladder so he can climb up and down.
Here's the basic pattern:
ch 17
1. dc in 4th st from hook and each st across- 15 dc (1st ch counts as dc), ch1, turn
2. FPhdc in first 5 st, dc, sc, dc, sc, dc, FPhdc in last 5 st, ch 3, turn
3. dc across, ch 1, turn
4. sc in first 2 st, dc, sc, dc, FPhdc in next 5 st, dc, sc, dc, sc in last 2 st, ch 3, turn
5. dc across, ch 1, turn
rep until it’s long enough. I made 3 pieces, one long and two short. Then I sewed them together in a C shape. I made a border with the burgundy yarn by working 2 rounds of sc around, with 3sc in each outside corner, and sc3tog in each inside corner.
I used hot glue to attach the upper level. It’s held up with the cardboard tubes and reinforced on each side with chopsticks. I attached the rug- also with hot glue- and let it hand across the top as a bridge. I also reinforced the front of the bridge with a chopstick because the weight of the yarn was pulling it down.
Here's what it looks like now!
The next step is adding a background...


No comments:
Post a Comment